They can be made with punches, dies or a variety of other things such as fussy cut printed digi embellishments, the trick is to make these easily and embellish them a fair bit to make them really look good. You want your embellies to look professional and good quality. I will be adding to these on a regular basis, so be sure to check in! = )
Plum Pudding for Christmas
Hand coloured stamp with copic markers, then scanned for resizing and repeated printing, these are then printed on demand in any size, fussy cut and embellished with stickles for a bit of WOW factor! = )

Christmas Present
If it got any easier you could do it in your sleep! Take a piece of cereal packaging and cut it in a 1 inch square, wrap it in Christmas paper (I used a printed digi one) Tie a little gold bow around it like a present and add a tiny handmade tag!

Alice in Wonderland Element Embellishment
These are also digi elements which can be resized and printed on demand, these are 2 inches. They have been fussy cut and popped with a foam button for that 3D effect. The centre suit, in this case spades, has been glossed with glossy accents and the whole edge of the card has been inked with black and then rubbed on the edges with gold rub'nbuff. It has all been placed on a small square black embossed base which has again been rubbed with the gold.

Butterfly on Flower
I was stuck for something to do and decided to use a punch for this one. I tried the butterfly on its own then on a 1 inch circle but it didn't look right. So I used another punch to create the flower which I glittered. I used glossy accents to gloss the butterfly's body and attach it to the flower, which is then attached with a pop dot to the black embossed 1 inch circle base. The edges of the butterfly's wings were distressed with black ink.

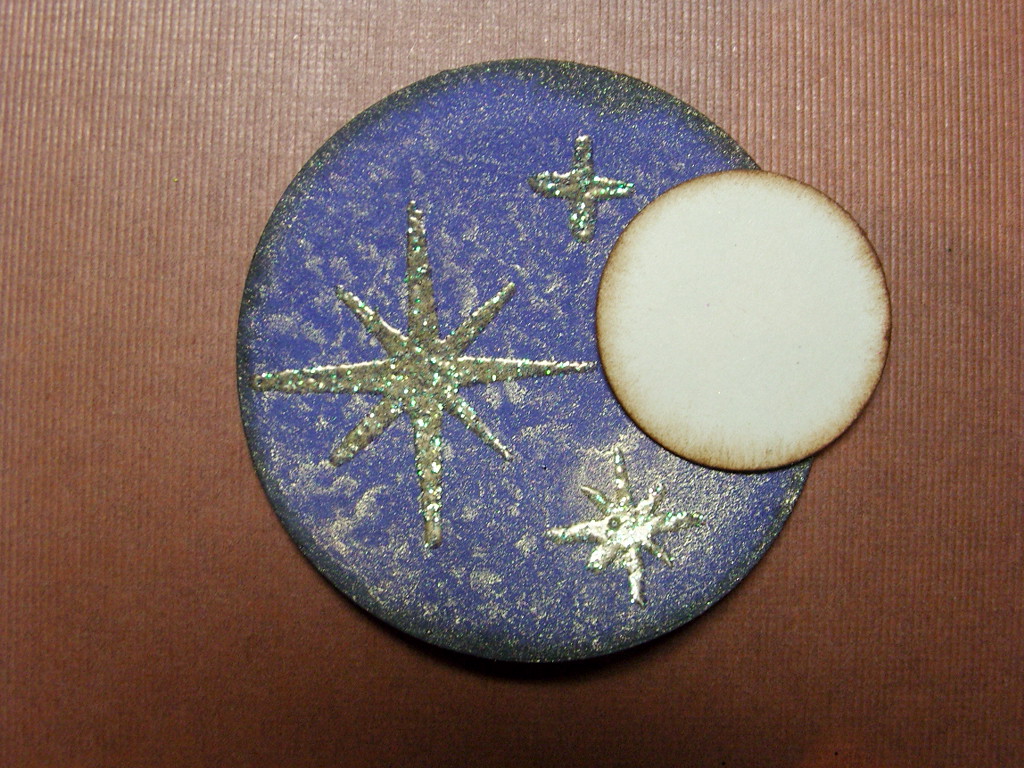
Starry Night
For this one the theme was starry night and I was really worried! I had nothing related to that theme at all! But I did have some star stamps from a Christmas collection and I tried to figure out how I was going to make an embellishment using only those! Then it hit me! The moon! So I made a moon with a small circle punch and distressed it with vintage photo, punched out a 2 inch navy circle which I glimmer misted with caramel apple and distressed with vintage photo and presto! Instant starry night! I stamped with a Versa Marker Stamp Pad and embossed with gold glitter powder.
The Acorn
For this one I was practicing with Tim Holtz embossing distress powder. I used the TH acorn die that comes with the movers and shakers mini pumpkin out of an old soft drink box, there were bits of glue that I peeled off and tore the cardboard a bit, but this just added to the realism in the end. I just inked the whole thing with Vintage Photo and then did the acorn top with Walnut Stain, then I versa marked the acorn part and UTEE'd it, once it cooled I versa marked the top and embossed it with Walnut Stain Distressed embossing Powder. It comes up looking like a real acorn! Try it! = )

Rusty Metal Lock
Again I used the TH Distress embossing powders. I used an unlikely combination of black cardstock, the TH die cut from his hardware findings set and Walnut Stain Distress powder.....the result? Magical! For a real rusty look, use the Vintage Photo powder instead! = ) even up close, you would swear it's metal if not for it's lack of weight and thickness! All you need to do is sponge the die cut with Versa Marker, sprinkle with the distressed embossing powder and heat with a heat gun. If you don't have any distress embossing powder you can make your own from 3 parts regular embossing powder to 1 part fine clean sand! Enjoy! = )

Thread Spools
These were so simple it hurts! I just recycled a cereal packet by cutting out spool dies using TH's Dress form die. Then I inked the whole thing with Vintage Photo. Finally I used real thread and wound it on. Aren't they cute?

Lock and Key
The little lock and key were made by gluing old newspaper to the back of a cereal packet and glimmer misting with Caramel Apple, then I used the TH lock and key die and cut them out. Ink the edges with Walnut Stain. These are bunched onto string and put on an ATC for easy storage and use. You can rub the edges with gold for a really cool look. I even keep the cut out lock hole!


That's all for today....tomorrow I will bring you Flowers, Hidden Journalling Spots and Page Candies. Stay tuned! ..........
hi! Thanks for pointing me here... love that metallic lock close-up photo! Thanks for the description... going to try it out for myself now!!! XOXO, Linda
ReplyDeleteThank YOU for visiting Linda! You are very welcome. Come back often for more tips, hints and tricks! = )
ReplyDeleteCheers,
Jen = )